Introduction
This tutorial will demonstrate App Inventor's Near Field Communication (NFC) capabilities. You'll build an application that will simulate the shell game by writing messages to NFC tags in setup mode and reading them in play mode. In order to get the full experience from this application, you will need to purchase readable, writable, NFC tags.
IMPORTANT: Applications built with the NFC component will not respond to tags while in live development mode. To test your application, you must build your app and download the APK to your phone. (How do I build an APK?)
Getting Started
Go to the App Inventor website, begin a new project titled 'BallShuffle', and connect your phone. Download the following images onto your computer and upload them into your project. (Right-click or ctrl-click and choose Save Image. Remember where you put them!)


Set up the Components
The user interface will consist of a menu at the top that lets you switch between the “setup” and “play” modes, a menu that will appear during setup mode and disappear during play mode, and in image that will change based on NFC input and output.
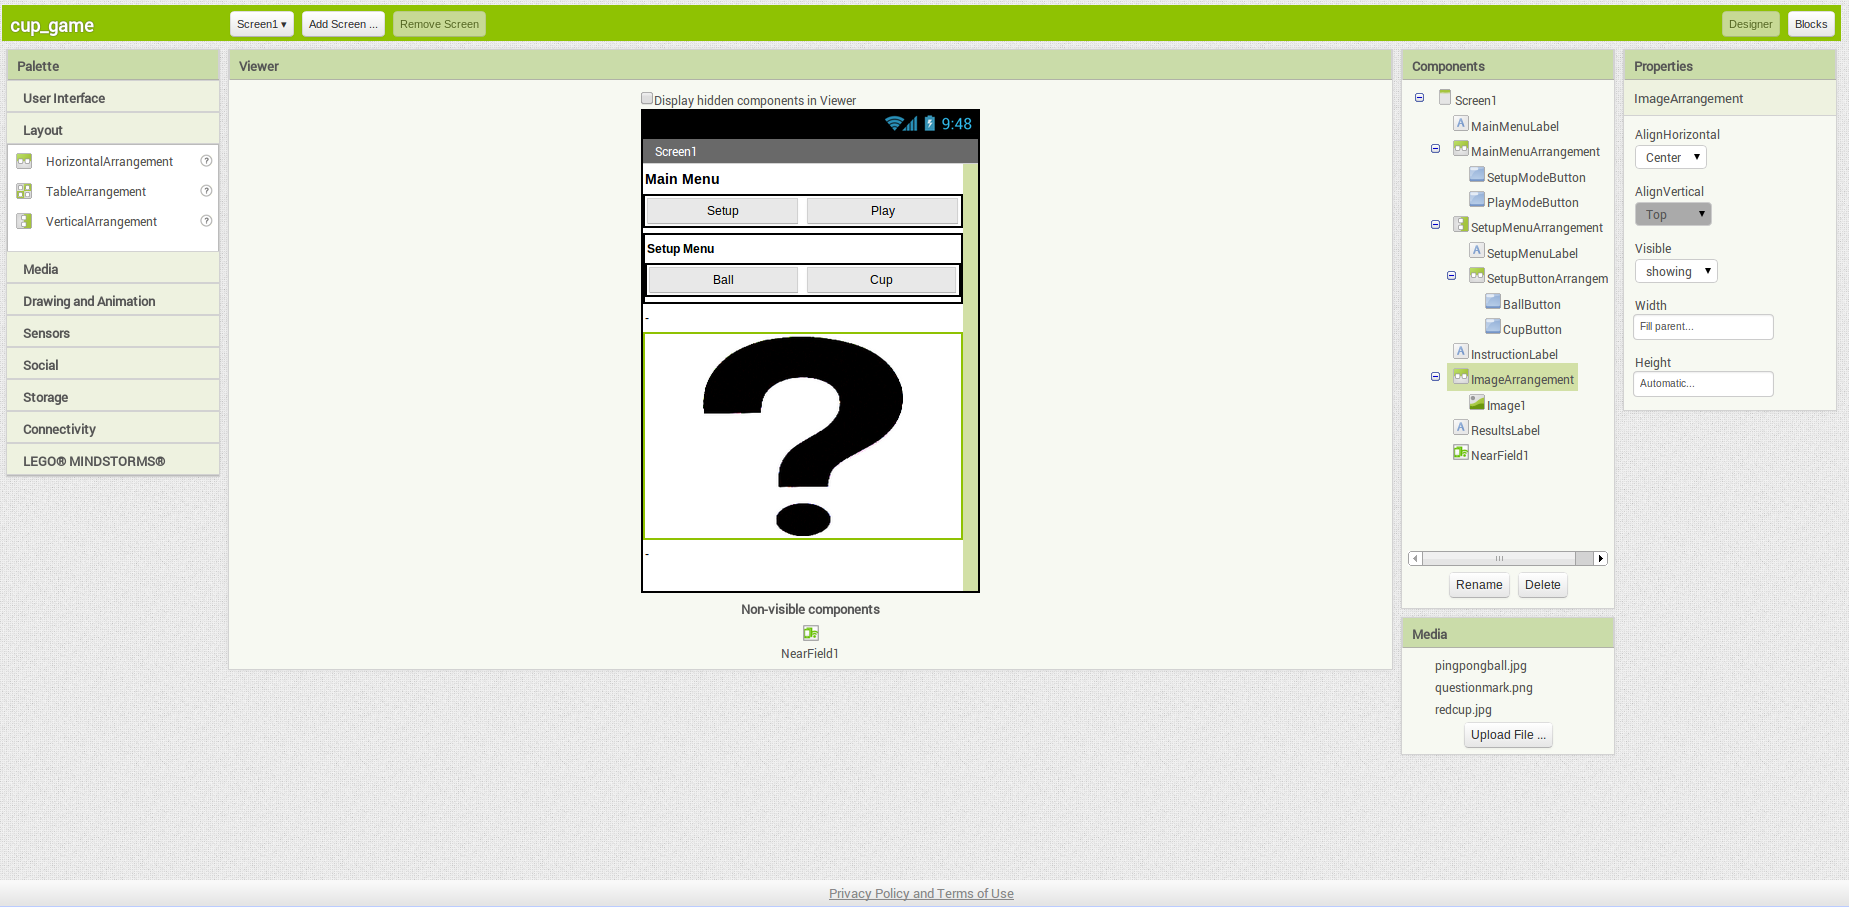
| Component Type | Palette Group | What You'll Name It | Purpose of Component | Component Settings |
| Label | User Interface | MainMenuLabel | Title bar for main menu | Text: Main Menu; Font: Bold; Fontsize: 16 |
| HorizontalArrangement | Layout | MainMenuArrangement | Line up two "mode" buttons side by side | Width: Fill Parent; Height: Automatic |
| Button | User Interface | SetupModeButton | Change to setup mode | Text: Setup; Width: Fill Parent |
| Button | User Interface | PlayModeButton | Change to play mode | Text: Play; Width: Fill Parent |
| VerticalArrangement | Layout | SetupArrangement | Width: Fill Parent; Height: Fill Parent | |
| VerticalArrangement | Layout | SetupMenuArrangement | Line up the setup menu options | Width: Fill Parent; Height: Fill Parent |
| Label | User Interface | SetupMenuLabel | Title bar for setup menu | Text: SetupMenu; Font: Bold |
| HorizontalArrangement | Layout | SetupButtonArrangement | Hold the buttons for setup menu | Width: Fill Parent; Height: Fill Parent |
| Button | User Interface | BallButton | Lets user define NFC tag as "ball" | Text: Ball; Width: Fill Parent |
| Button | User Interface | CupButton | Lets user define NFC tag as "cup" | Text: Cup; Width: Fill Parent |
| Label | User Interface | InstructionLabel | Give the user instructions for the mode they are in | Text: -; Width: Fill Parent |
| Image | User Interface | Image1 | Place holder for images | Height: 200 pixels; Width: Fill Parent; Picture: questionmark.png |
| Horizontal Arrangement | Layout | ImageArrangement | Allows you to center the image | AlignHorizontal: Center; Width: Fill Parent; |
| Label | User Interface | ResultsLabel | Show results of user's actions | Text: -; Width: Fill Parent |
| NearField | Sensors | NearField1 | Gives access to NFC capabilities | ReadMode: checked; |
Add Behaviors to the Components
We're going to build all of the menus and make the menus work, then we'll modify them to incorperate the NearField component.
To start, we're going to create several variables to make it easier to reference text that will be reused throughout the application:

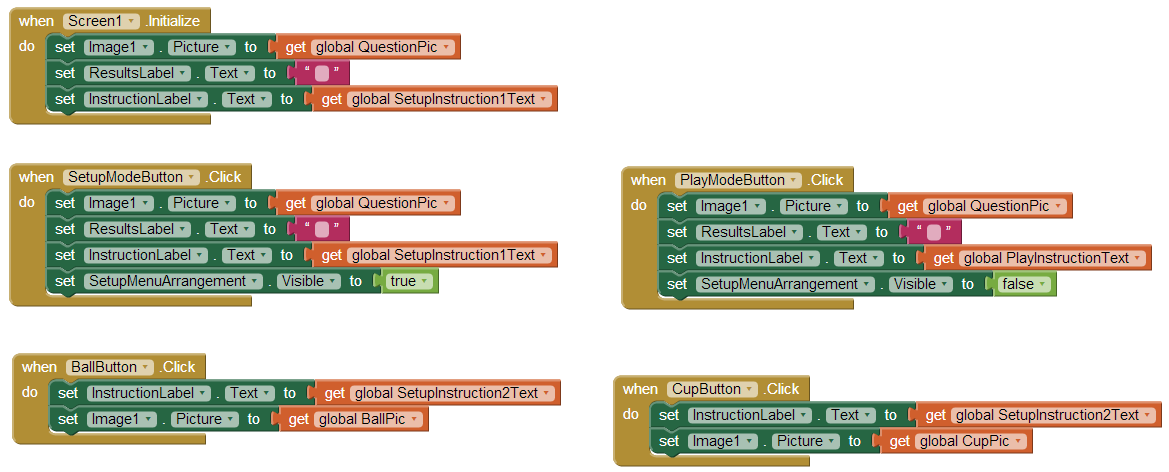
Next we're going to define the initialization behavior and define the button behavior:
When the screen is initialized, we want the app to display the question mark picture and the setup instructions. Since the SetupMenuArrangement is initially set to visible, we don't have to address it in the Screen1.Initialize block. When the user clicks on the SetupModeButton or on the PlayModeButton, then we want to change the SetupMenuArrangement to visible or invisible respectively. In addition, when the user clicks one of these two buttons, we want to make sure that the correct instructions for that mode is displayed and that the image resets to the question mark picture. When the user clicks on BallButton, we want the image to a change picture of the ball and the CupButton should change the image to a picture of the cup.
The blocks should look like the image below and the buttons should correctly toggle all of the images
Now that the interface works correctly, we're going to add the NFC functionality to the app. We're going to modify the 5 blocks by adding the correct NFC behavior to each one. This will make the buttons turn on read mode when the

Now, we define the app's behavior when a tag is written. When the app writes a tag, we want the the instructions to update, we want the picture to reset, and we want to change NearField1.ReadMode to true so that the tag isn't accidentally overwritten.

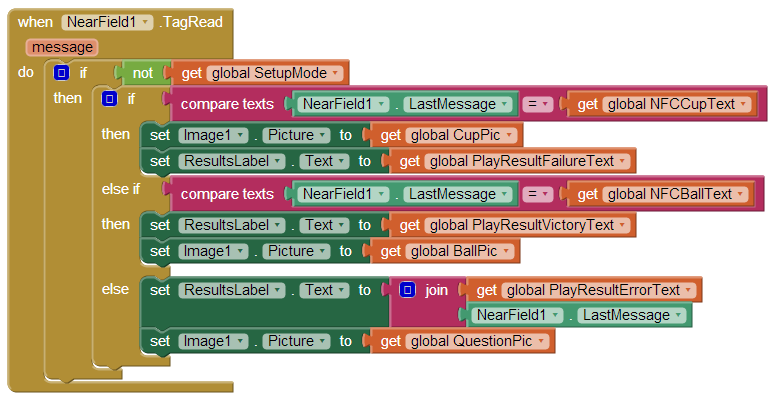
Finally, we're going to define the tag read block which contains the majority of the logic for the app. If the app is in play mode and it reads a tag that says "ball," then it will display the victory message and show a picture of a ball. If it reads "cup," then it will display the loss message and show a picture of a cup. Finally, if it doesn't recognize the message, it will display an error message and append the message to the end.
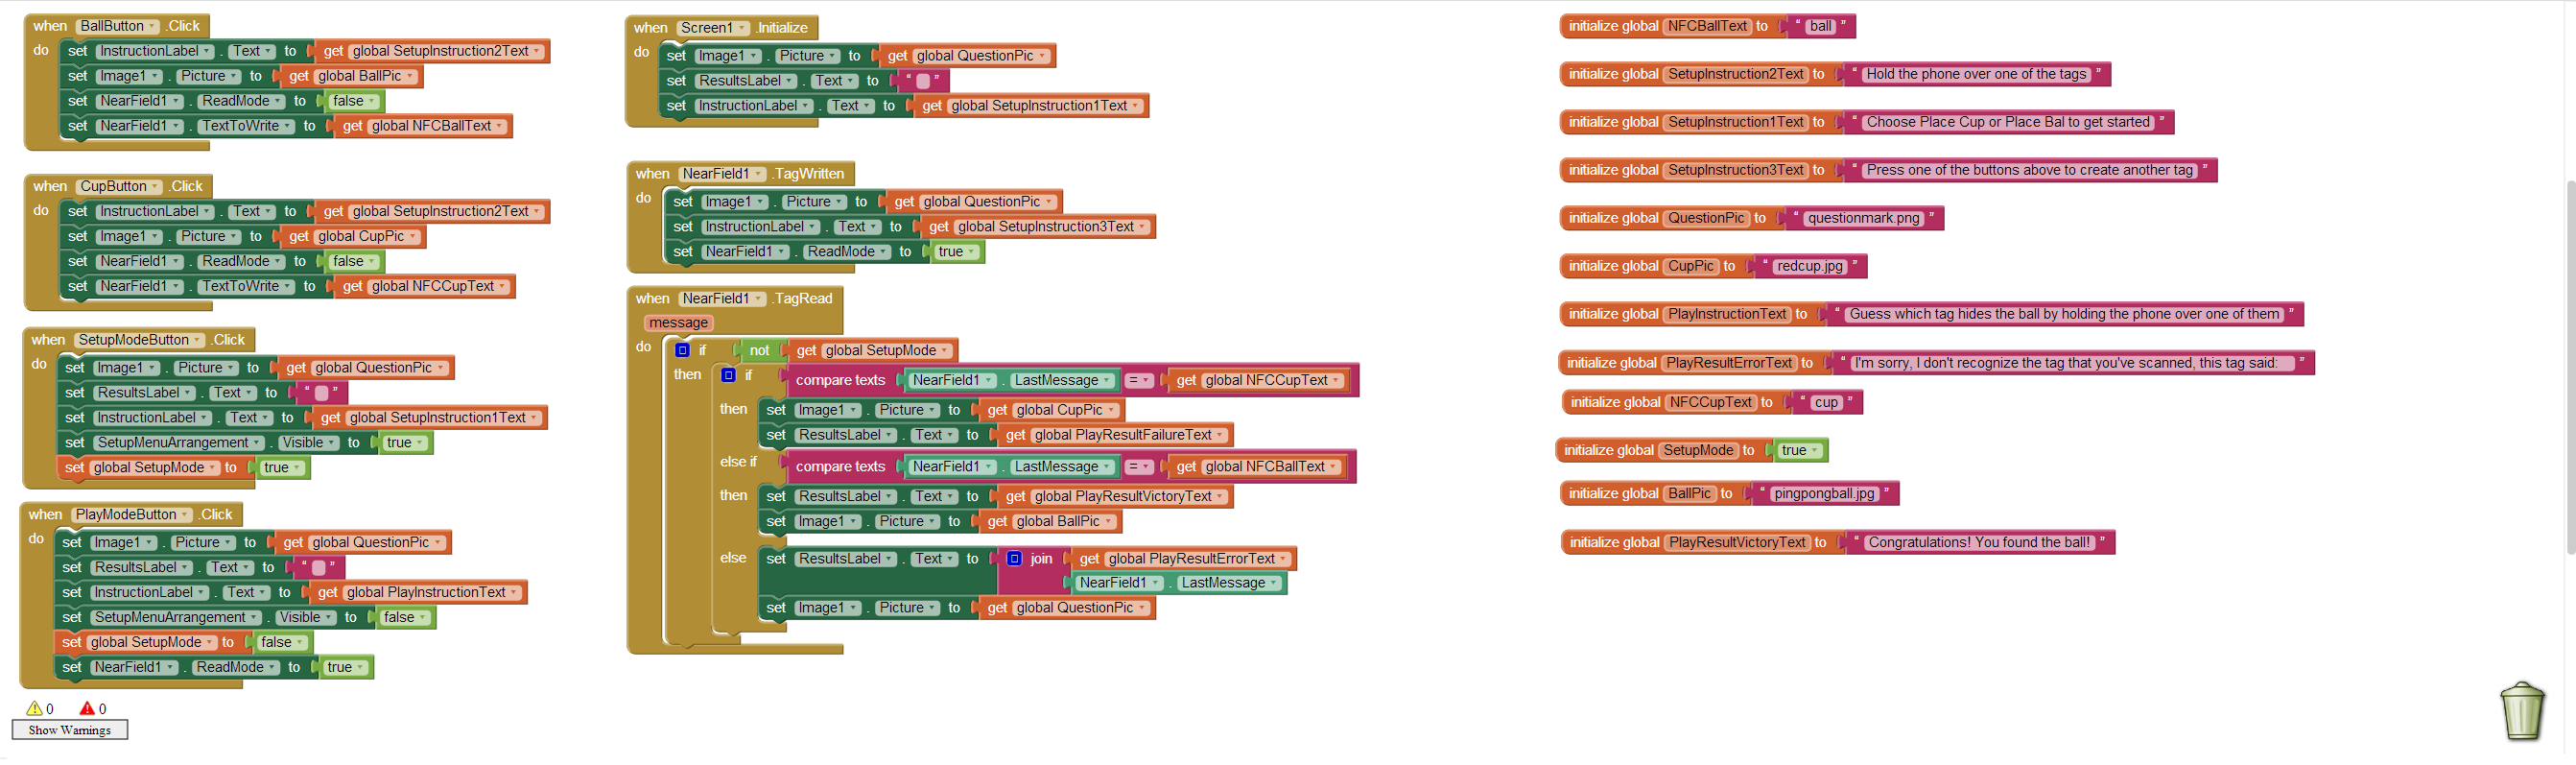
Finally, here's a screen shot of the entire completed app
Download Source Code
If you'd like to work with this sample in App Inventor, download the source code to your computer, then open App Inventor, go to the My Projects page, and choose More Actions | Upload Source.
Done with CupGame? Return to to the other App Inventor 2 tutorials here.
Tutorial Version: App Inventor 2
Tutorial Difficulty: Advanced
Tutorial Type: NFC (Near Field Comm.) Game
댓글 없음:
댓글 쓰기