Using AppToMarket 4.1 and Screen2 in your project you can achieve this.
Let us begin by making Screen1 and Screen2 that we will use as sidebar or side menu.
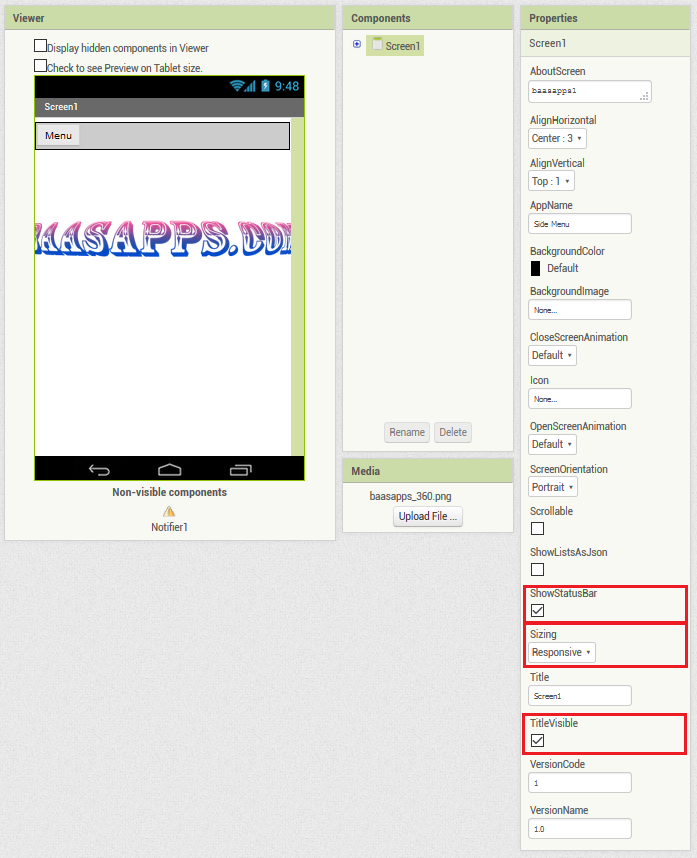
Screen1 Designer:ShowStatusBar: Checked
TitleVisible: Checked
Sizing: I prefer responsive before fixed
TitleVisible: Checked
Sizing: I prefer responsive before fixed
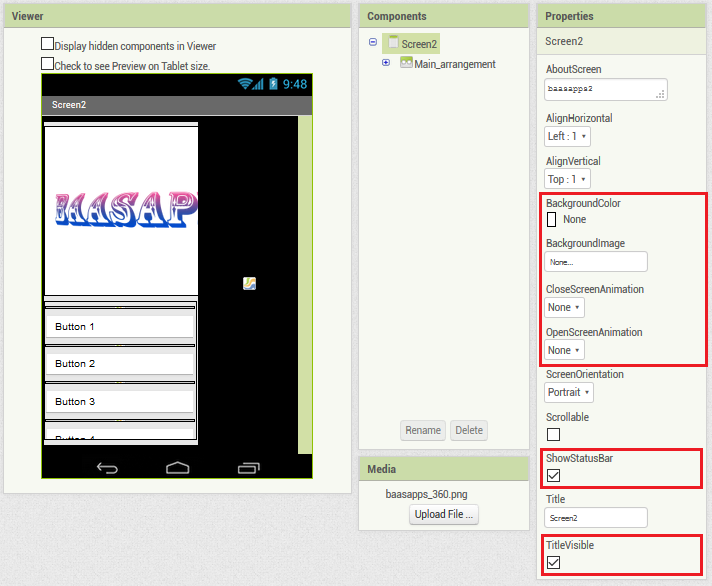
Screen2 Designer:
BackgroundColor: None
BackgroundImage: None
CloseScreenAnimation: None
OpenScreenAnimation: None
ShowStatusBar: Checked
TitleVisible: Checked
BackgroundColor: None
BackgroundImage: None
CloseScreenAnimation: None
OpenScreenAnimation: None
ShowStatusBar: Checked
TitleVisible: Checked
Main arrangement
BackgroundColor: None
Height: Fill parent
Width: Fill parent
BackgroundImage: None
Height: Fill parent
Width: Fill parent
BackgroundImage: None

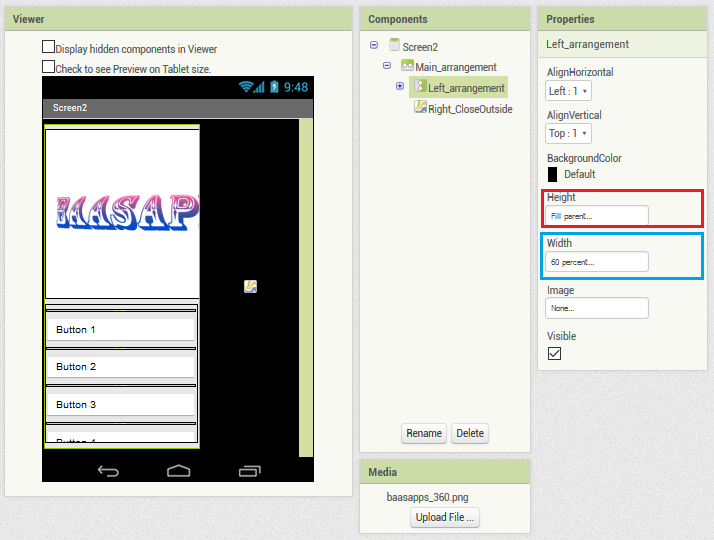
Left arrangement
For images, buttons, text etc.
Height: Fill parent
Width: 60% or doing this in blocks
For images, buttons, text etc.
Height: Fill parent
Width: 60% or doing this in blocks
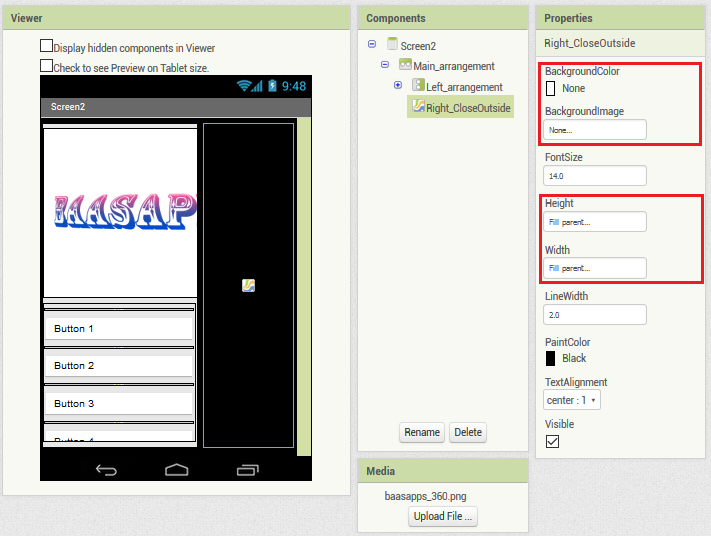
Right arrangementFor the simulation of Close Outside.
BackgroundColor: None
BackgroundImage: None
Height: Fill parent
Width: Fill parent
BackgroundColor: None
BackgroundImage: None
Height: Fill parent
Width: Fill parent
and that’s all in MIT AI2, download and save your project.apk in ..AppToMarket_v41\myApks\ folder.
AppToMarket is where the magic is created, but before we start with AppToMarket we need to create a theme and two animations, left to right and right to left, which in turn will take control over our Screen2.
Theme: mycustomtheme.xml
Animation 1: slide_from_left_to_right_enter.xml
Animation 2: slide_from_left_to_right_exit.xml
this page was very helpful in understanding the animations.
Launch your AppToMarket and browse for your project.
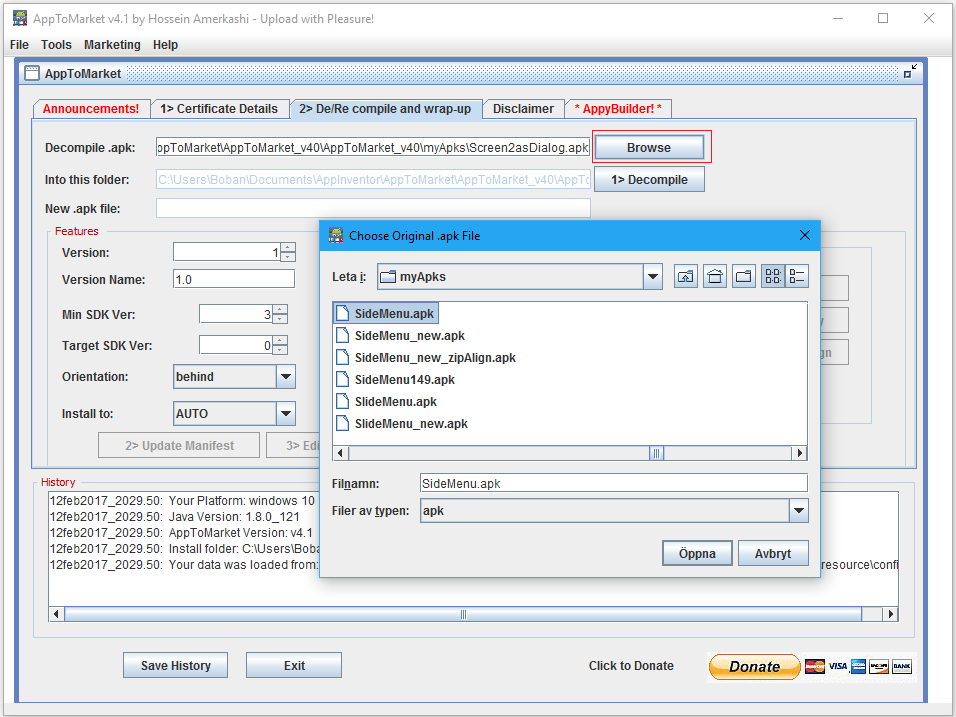
Decompile
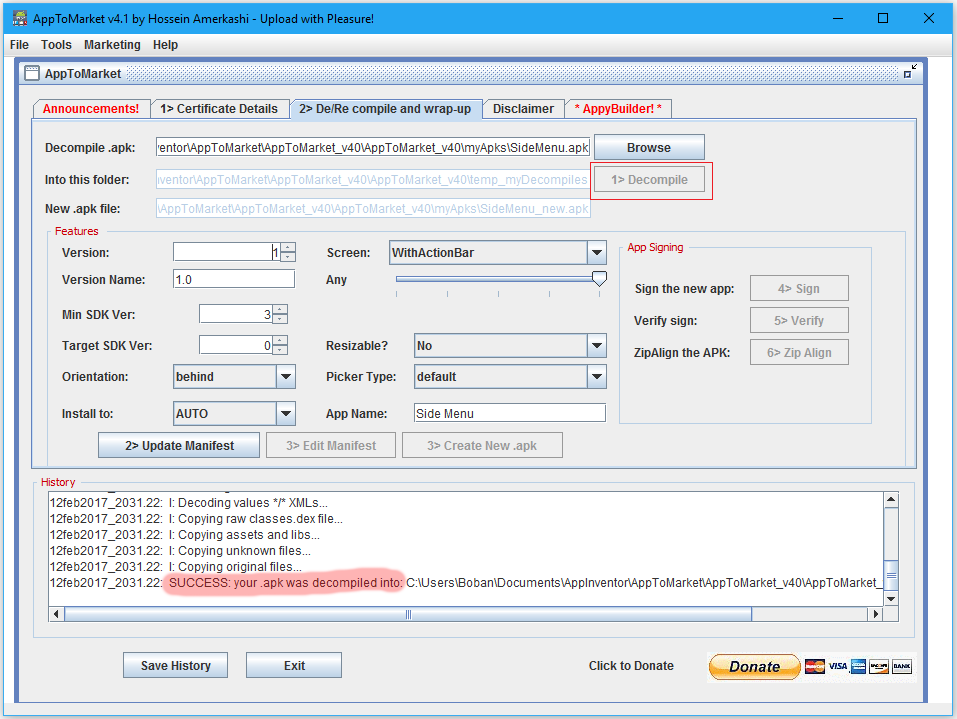
Features & Update ManifestSelect necessary features and update Manifest
Screen: NoTitleBar = TitleVisible: Unchecked
Slider: Set it to Any
Screen: NoTitleBar = TitleVisible: Unchecked
Slider: Set it to Any
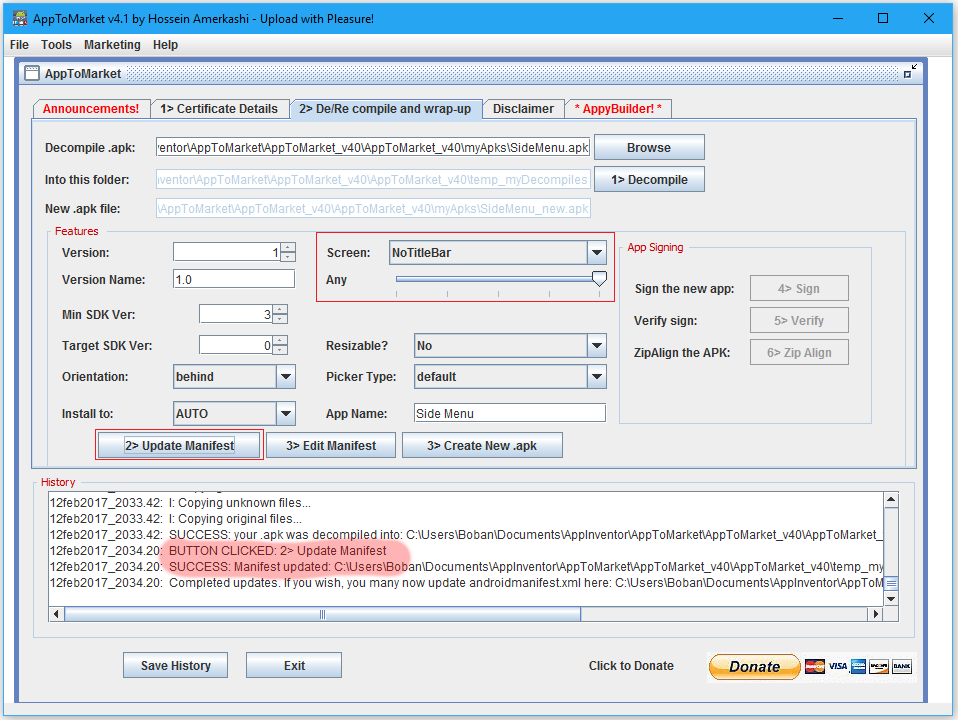
Edit Manifest
You’ll have to add
android:theme="@style/Theme.myCustomTheme" manually to our Screen2 in the manifest file.
Save Manifest.
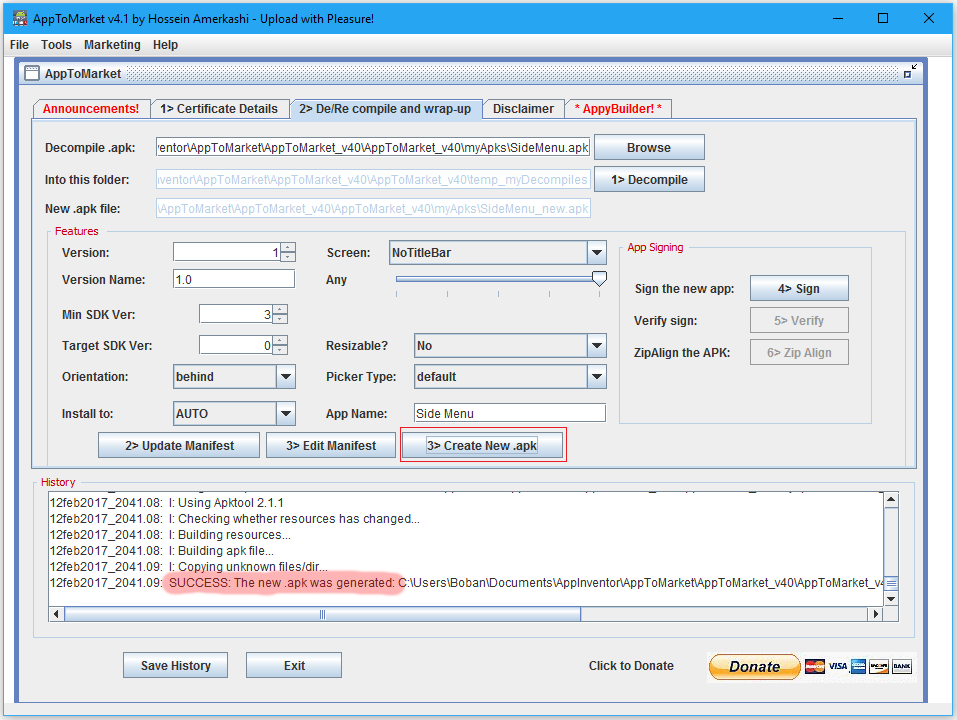
and the last thing before you click the Create New.apk button
move your file mycustomtheme.xml to …AppToMarket_v41\temp_myDecompiles\res\values\ folder
move your files slide_from_left_to_right_enter.xml and slide_from_left_to_right_exit.xml to …AppToMarket_v41\temp_myDecompiles\res\anim\ folder
Create New.apk
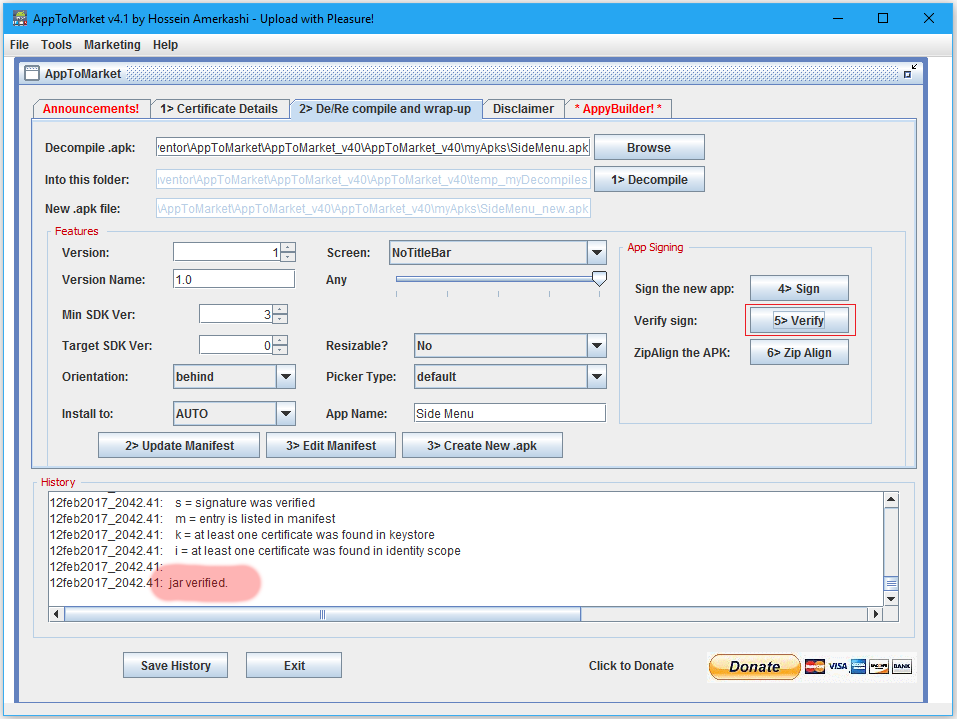
Sign

Verify
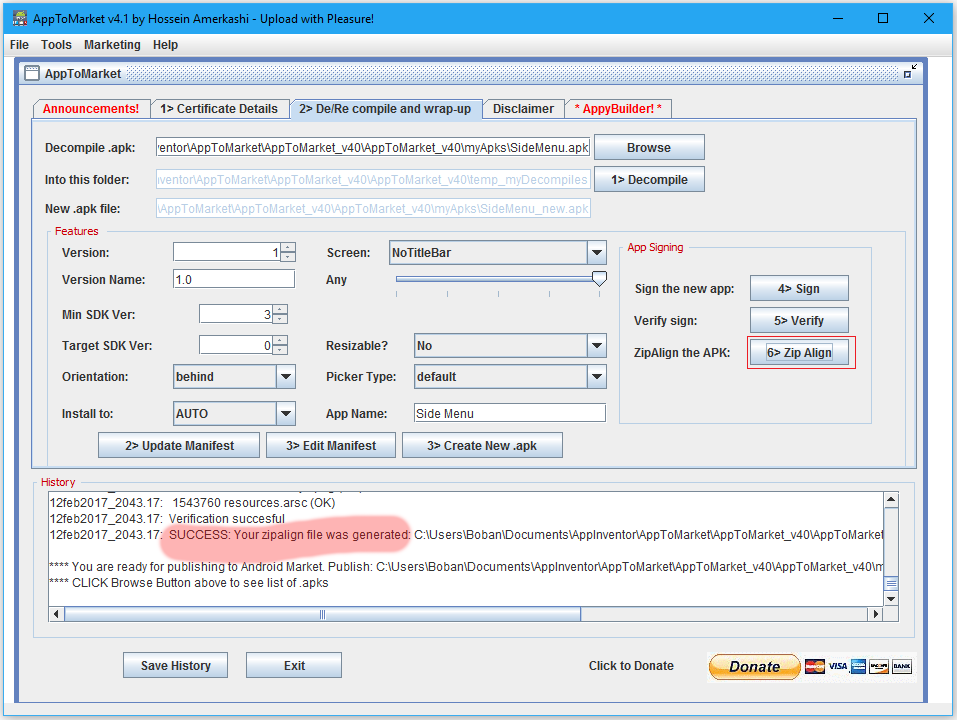
Zip Align
Download
댓글 없음:
댓글 쓰기